Hardhat
Hardhat testing and deployment
Hardhat is an excellent tool that facilitates building on the Ethereum Virtual Machine. It helps developers manage and automate the recurring tasks that are inherent to the process of building smart contracts and dApps, and it allows them to easily introduce more functionality around this workflow. This includes compiling and testing at the very core. Flexible deployment options also allow you to point to the Subspace EVM domain RPC to deploy your contracts and dApps.
Official documentation for Hardhat is available on their website, but this guide will cover everything required to get you started.
Prerequisites Make sure you have NodeJS version >=16.0 installed.
- Open a new terminal and run these commands to create a new folder for the project.
mkdir subspace-hardhat
cd subspace-hardhat
- Then initialize an npm project as shown below. You'll be prompted to answer some questions.
npm install --save-dev hardhat
npm install --save-dev @openzeppelin/contracts
npx hardhat
Select "Create a JavaScript Project" from the list of the available options. Select project root folder and select to create a .gitignore file (optional).

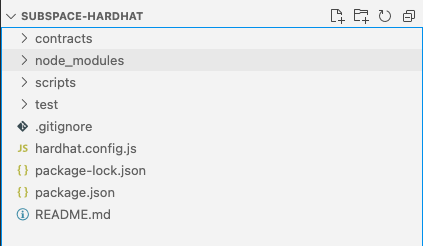
- Right after you create your workspace, you will notice several folders. All of your contracts will reside inside the
contractsfolder, deployment scripts are available inside thescriptsfolder, and tests can be found inside thetestfolder. Click on the contracts folder and openLock.sol.
- When in
Lock.sol, you can change the name of your contract (in the example, toCounter), the name of the token (in this example, we're calling itSubspaceTestToken) and the token symbol (we're usingTSSCtest).
Let’s add a simple smart contract that has three functions - setNumber(), increment() and decrement().
// SPDX-License-Identifier: UNLICENSED
pragma solidity ^0.8.9;

import '@openzeppelin/contracts/token/ERC20/ERC20.sol';

contract Counter is ERC20 {
    constructor() ERC20("SubspaceTestToken", "TSSCtest") {}

    uint256 public number;

    function setNumber(uint256 newNumber) public {
        number = newNumber;
    }

    function increment() public {
        number++;
    }

    function decrement() public {
        number--;
    }
}
Let's also rename the filename to Counter.sol for consistency.
- Deploying a smart contract can be an expensive procedure due to the gas costs associated with the transaction. Hence, it’s advisable to thoroughly test the smart contracts for correctness before proceeding with deployment. To test the contract, open the tests folder and examine the Lock.js file created for us. Replace the internals of the file with the following code:
const { expect } = require("chai");

describe("Counter", function() {
let Counter;
let counter;
let owner;
let addr1;

beforeEach(async function() {
    Counter = await ethers.getContractFactory("Counter");
    [owner, addr1] = await ethers.getSigners();

    counter = await Counter.deploy();
});

describe("Counter operations", function() {
    it("Should return initial value of zero", async function() {
    expect(await counter.number()).to.equal(0);
    });

    it("Should set number to a new value", async function() {
    await counter.setNumber(5);
    expect(await counter.number()).to.equal(5);
    });

    it("Should increment the number", async function() {
    await counter.setNumber(5);
    await counter.increment();
    expect(await counter.number()).to.equal(6);
    });

    it("Should decrement the number", async function() {
    await counter.setNumber(5);
    await counter.decrement();
    expect(await counter.number()).to.equal(4);
    });
});
});
For consistency, let's also rename Lock.js to CounterTest.js
- To run the test, simply type
npx hardhat test
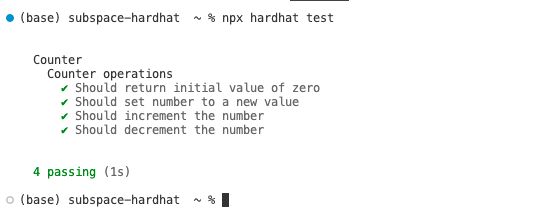
Great, looks like everything is working as expected. We’re all set for the deployment!
- In order to deploy the contract, we need to set a deployment network for hardhat.
Open
hardhat.config.jsfile and add the subspace to the list of networks.
require("@nomicfoundation/hardhat-toolbox");
module.exports = {
solidity: "0.8.19",
networks: {
    subspace: {
    url: "https://nova-0.gemini-3h.subspace.network/ws",
    accounts: ["private_key_to_your_account"]
    }
}
};
Be careful to not commit hardhat.config.js file as it contain your private key. You can use NPM tools like dotenv to securely store your private keys in the .env file.
- Open to
deploy.jsfile and replace the content with the code.
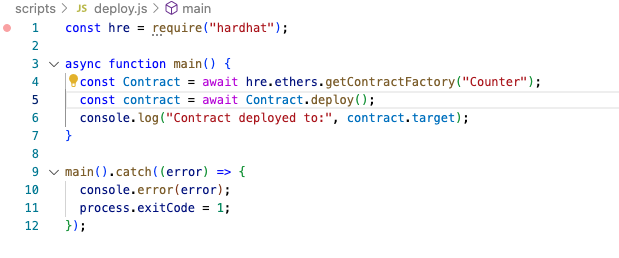
const hre = require("hardhat");

async function main() {
const Contract = await hre.ethers.getContractFactory("Counter");
const contract = await Contract.deploy();

console.log("Contract deployed to:", contract.target);
}

main().catch((error) => {
console.error(error);
process.exitCode = 1;
});
- You're all set to deploy your smart contract on Subspace Network!
In order to deploy, run
npx hardhat run scripts/deploy.js --network subspace.
This command will deploy your smart contract on the network we've just specified in hardhat.config.js file.
In case of success deployment, you should see Contract deployed to: transaction hash.

- Congratulations, you've successfully deployed your smart contract on the Subspace EVM domain!