Remix IDE - testing and deployment
Remix IDE guide
Remix is a great tool that allows you to easily write, test and deploy smart contracts on any EVM-compatible blockchain. Moreover, integration with MetaMask allows the utilization of any RPC, that’s why we’ve just set up a reference to Subspace core EVM in our MetaMask wallet!
Remix has amazing documentation, but this guide will cover everything required to get you started.
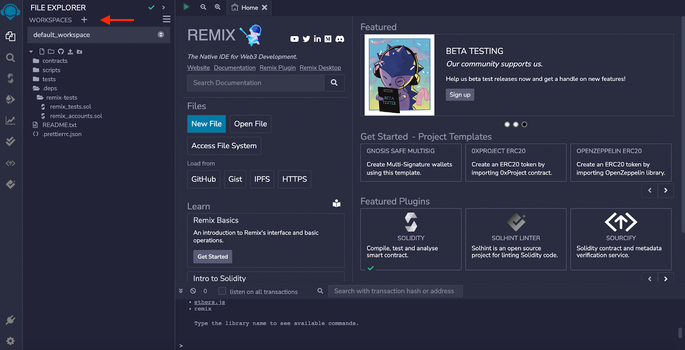
- Using the browser of your choice navigate to Remix website. You will see a file explorer and interface for creating new workspaces, integrations with GitHub, Gist, IPFS, HTTPS, preloaded templates, and plugins. Let’s create a new workspace by clicking on the + sign beside WORKSPACES.
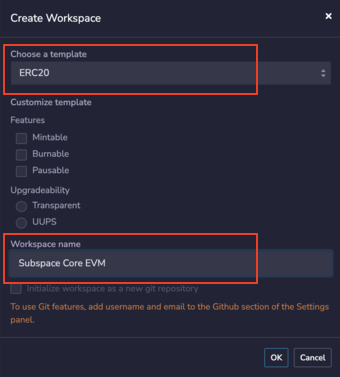
- You can enter any name and use the ERC20 template.
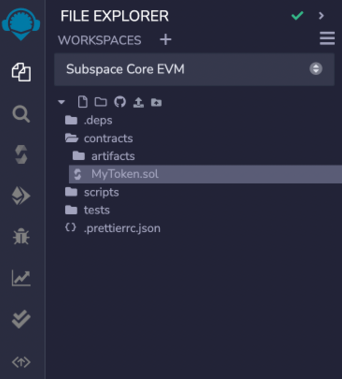
- Right after you create your workspace, you will see a few folders created for you.
Let’s click on contracts and have a look at
MyToken.sol.
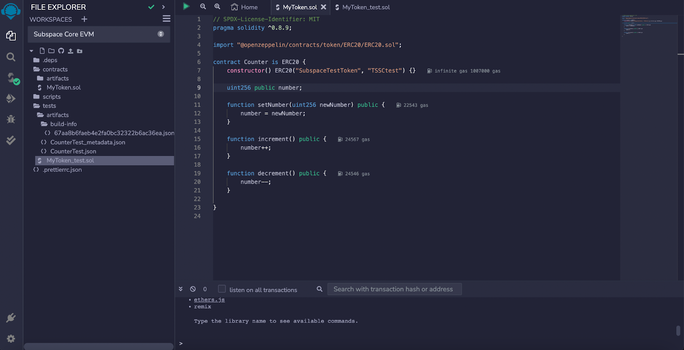
- Here, you can change the name of your contract (in the example, to
Counter), the name of the token (in this example, we're calling itSubspaceTestToken) and the token symbol (we're usingTSSCtest). Let’s add a simple smart contract that has three functions -setNumber(),increment()anddecrement().
 // SPDX-License-Identifier: MIT
pragma solidity ^0.8.9;

import '@openzeppelin/contracts/token/ERC20/ERC20.sol';

contract Counter is ERC20 {
    constructor() ERC20("SubspaceTestToken", "TSSCtest") {}

    uint256 public number;

    function setNumber(uint256 newNumber) public {
        number = newNumber;
    }

    function increment() public {
        number++;
    }

    function decrement() public {
        number--;
    }
 }
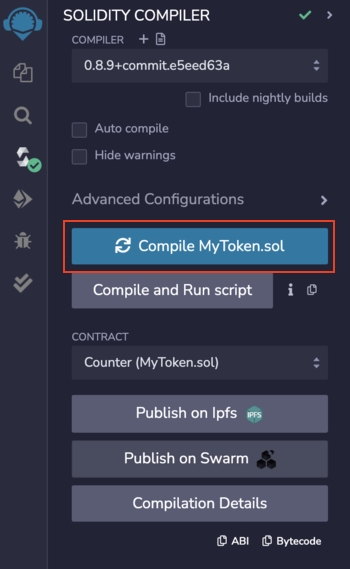
- Next, let’s compile a
Countercontract. To compile, click on SOLIDITY COMPILER on the left and choose the compiler version that corresponds to the Solidity version of your contract. In our case, it’s version 0.8.9. Click onCompile MyToken.soland check if it compiles correctly. If it does, you will see a green checkmark by the compiler.
- Deploying a smart contract could be an expensive procedure, based on the gas costs associated with the transaction. That is why it’s recommended that you thoroughly test the smart contracts for correctness before proceeding with deployment.
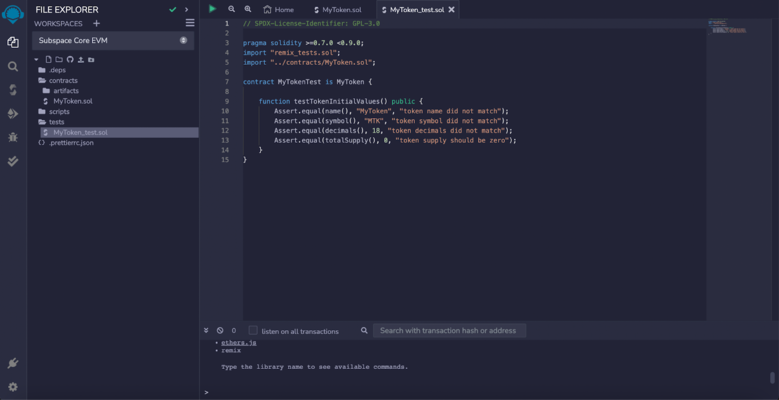
To test the contract, let’s open the tests folder and have a look at
MyToken.solcreated for us.\ Let’s first try to run a test as is without making any changes.
- To run the tests, select SOLIDITY UNIT TESTING in the bar on the left and click Run.
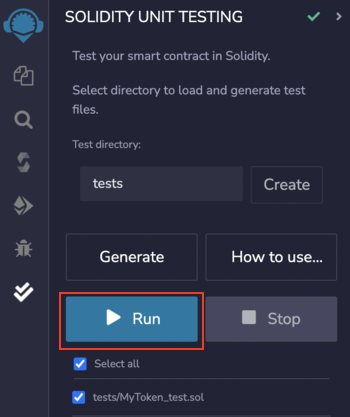
- As expected, the test failed because we manually changed the token name and symbol.
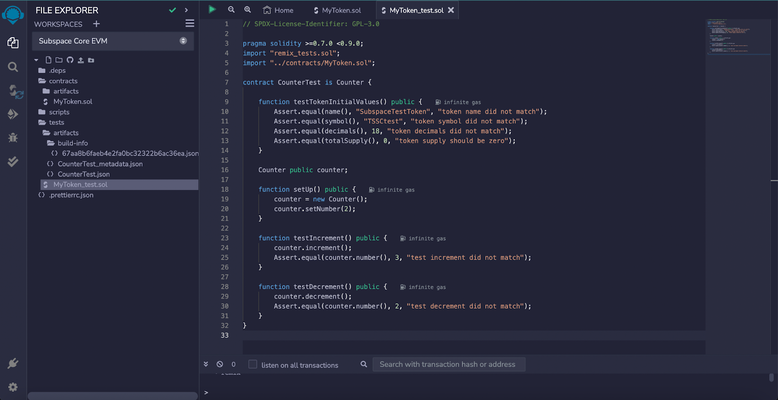
This is Test Driven Development (TDD) in action! In order to make the test pass, replace the internals of
MyToken.solwith the provided below code. In the test, we're adding a few assertions for theincrement()anddecrement()functions. In this example, we will set up an initial value ofnumberto 2 andincrementand thendecrementit by 1. We would expect the number to increase to 3 and then decrease back to 2.
 pragma solidity >=0.7.0 <0.9.0;
 import "remix_tests.sol";
 import "../contracts/MyToken.sol";

 contract CounterTest is Counter {

    function testTokenInitialValues() public {
        Assert.equal(name(), "SubspaceTestToken", "token name did not match");
        Assert.equal(symbol(), "TSSCtest", "token symbol did not match");
        Assert.equal(decimals(), 18, "token decimals did not match");
        Assert.equal(totalSupply(), 0, "token supply should be zero");
    }

    Counter public counter;

    function setUp() public {
        counter = new Counter();
        counter.setNumber(2);
    }

    function testIncrement() public {
        counter.increment();
        Assert.equal(counter.number(), 3, "test increment did not match");
    }

    function testDecrement() public {
        counter.decrement();
        Assert.equal(counter.number(), 2, "test decrement did not match");
    }
 }
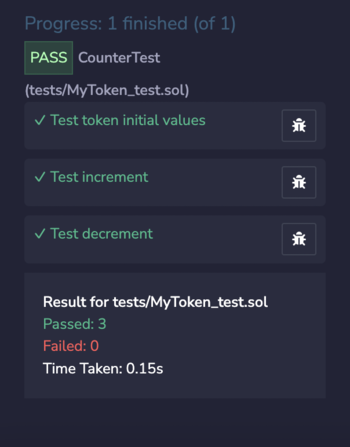
- Great, all tests are now passing which means our smart contract
Counteris indeed working as we expect. We’re all set to deploy it now!
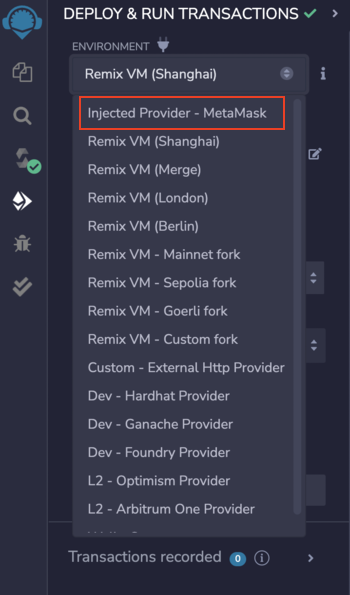
- To deploy click on the DEPLOY AND RUN TRANSACTIONS tab on the left. Remix allows you to use one of the existing EVMs or inject your own provider through its integration with MetaMask. Since we already have a MetaMask Account set up, let’s use this option.
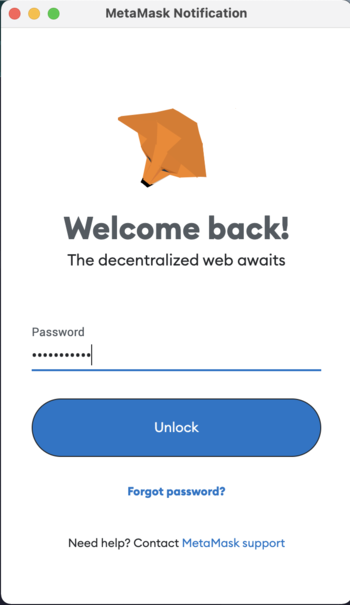
- You will be prompted to confirm the password with MetaMask, just make sure that the network you’re connected to is Subspace EVM.
- Adjust the gas limit and deploy your smart contract on Subspace Core EVM.
Now your transaction is recorded and you can interact with your smart contract at the bottom of the page - it's possible to call the functions
increment()anddecrement()as well assetNumber()
caution
Do not attempt to speed up a transaction (do not include a tip on top of the gas fees). To read more about this, please refer to this section.

Congratulations, you've just deployed your smart contract on Subspace Core EVM!